You've already tried the "obvious" fixes. New saddle. More expensive bib shorts. Maybe even a professional bike fit that felt helpful for two weeks — then the numbness crept back.
Here's the frustrating truth: saddle discomfort doesn't come from one broken variable. It comes from two variables that were never calibrated together . Your saddle position and your chamois pad work as a system. Misalign them by even a few millimeters, and you feel it — perineal pressure, sit bone pain, or inner-thigh chafing that chamois cream can't fix.
This guide takes a different approach. For brands developing custom cycling bib shorts, understanding how saddle position interacts with chamois design is just as important as selecting premium fabrics.Start with the specific symptom you're feeling right now . From there, you'll work through a simple, at-home diagnostic process that treats saddle height, fore-aft adjustment, and chamois geometry as one contact-point problem — not three separate ones. The whole workflow takes 30 minutes. You can finish it before your next ride.
Diagnostic Matrix: Mapping 6 Riding Discomfort Signals to Saddle or Bib Short Causes

Most riders treat saddle discomfort as a single problem. It isn't. There are six distinct problems — each with a different origin, a different fix, and a different set of adjustments. Some work. Some don't.
The table below is your starting point.Many performance cycling apparel supplier teams use similar symptom-mapping frameworks when evaluating rider feedback during product development. Find your symptom. Follow its root cause. Then use the specific adjustments in the next section.
Symptom | Primary Cause | Secondary Cause | First Adjustment |
|---|---|---|---|
Perineal numbness | Saddle nose too high or too far back | Chamois too thick, pushing tissue forward | Tilt nose down 1–2°; move saddle 3–5 mm forward |
Sit bone pain / hotspots | Saddle too narrow (<10 mm per side clearance) | Chamois too thin for body weight | Measure sit bones in riding posture; add ~20 mm to choose saddle width |
Inner thigh chafing | Saddle too high → pelvic rocking | Bib shorts too large, fabric bunching at the sides | Lower saddle 3–5 mm; check gripper lies flat in riding position |
Bib shorts shifting / puckering | Chamois pad misaligned with sit bones | Wrong bib size or cut | Bend forward off the bike; verify pad stays centered and flat |
Coccyx / tailbone pressure | Saddle nose tilted too far down | Rider sliding forward off saddle | Reset tilt to 0° using a digital level; move saddle 5 mm forward |
Anterior knee pain | Saddle too low or too far forward | Not enough setback, knee over-tracks pedal | Raise saddle 3–5 mm; move rearward until kneecap tracks over pedal axle |
Why This Matrix Works Better Than Guessing
Every cycling symptom has its own signature pattern . That's a specific mix of position and gear variables that produces it. Perineal numbness almost always comes from nose angle and fore-aft position working together — not one or the other. Inner thigh chafing almost always starts with saddle height, not chamois quality. Know the signature, and you stop fixing the wrong thing.
A few critical flags to keep in mind:
Persistent groin numbness that doesn't clear up within two rides of positional changes needs medical attention — not another saddle swap.
Riders over 75–80 kg with sit bone pain should try a multi-density chamois before going wider on the saddle. Pad density scales with body weight, but most product descriptions skip that detail entirely.
Anterior knee pain under load paired with a stable, non-rocking pelvis points to saddle height or setback — not chamois fit. That's almost always the cause.
The goal is simple: spend five minutes with this matrix before spending another dollar on gear.
Saddle Height Calibration: ±5mm Increments and Knee Tracking Mechanics
Saddle height is the one variable that breaks everything else if you get it wrong. Not because it's complicated — but because a 5mm error compounds. It shifts your knee angle, changes your pelvic tilt, and forces your body into compensations. The pain shows up somewhere different from the real cause.
Fix height first. Experienced cycling apparel OEM programs often incorporate saddle-height testing protocols during wear trials to verify long-distance comfort performance.Everything else — fore-aft, tilt, chamois alignment — gets calibrated against this baseline.
Calculate Your Starting Point
Use the LeMond formula: saddle height = 0.883 × inseam , measured from the bottom bracket center to the top of the saddle along the seat tube.
To measure inseam: stand barefoot against a wall. Press a book between your legs up to your pubic bone (mimicking saddle contact). Mark the wall at the top of the book. Measure floor to mark.
One practical adjustment: start 5mm below your calculated LeMond value . Shoe stack height, flexibility, and pedaling style all pull the real-world optimal lower than the formula predicts.
The Heel-Pedal Verification Test
Before touching a goniometer or video app, do this quick static check:
Lean your bike against a wall or set it on a trainer
Sit in your normal riding position
Place your heel on the pedal spindle and backpedal to the 5 o'clock position
Your leg should be straight — knee locked, no hip rock
Knee still bent at 5 o'clock → saddle too low → raise 3–5mm
Hips rocking to reach the pedal → saddle too high → lower 3–5mm
After passing the heel check, return your foot to normal forefoot position over the pedal spindle. You should feel a slight — not deep — knee bend at the bottom of the stroke.
Dial In with the 25–30° Rule
Static checks get you close. Dynamic verification locks it in.
Place your foot in normal pedaling position at bottom dead center (6 o'clock). Your target knee flexion is 25–30° . Use a slow-motion video from the side, or a free angle-measurement app.
Knee Angle at BDC | What It Means | Adjustment |
|---|---|---|
> 35° | Saddle too low — quads overloaded | Raise 3mm |
25–30° | Optimal range | No change |
< 25° | Saddle too high — overextension risk | Lower 3mm |
The working rule: 1mm of saddle height ≈ 1° of knee angle change at BDC . A 5mm raise shifts your knee angle by about 5°. So you're never guessing at the size of your next adjustment.
What Each Error Pattern Feels Like
Too high (+3–5mm above optimal): Your body compensates by pointing your toes and rocking your pelvis side to side to reach the bottom of the stroke. You get hamstring strain, posterior knee discomfort, and pelvic instability that looks like chamois misalignment. Many riders buy new bib shorts trying to fix a problem that's just 4mm of saddle height.
Too low (−3–5mm below optimal): Your knee stays in too much flexion throughout the stroke. Quad fatigue sets in fast, and anterior knee pain builds under load. The position feels cramped and underpowered — like you're spinning against yourself.
The Calibration Loop
Make an adjustment, then ride 30 minutes at Zone 2 effort before changing anything else . Zone 2 is the right intensity — hard enough to show real movement patterns, easy enough that fatigue doesn't distort your feedback.
Repeat this loop — adjust 3mm, ride 30 minutes, reassess — until all three of these are true:
No hip rock during the pedal stroke
BDC knee angle sits in the 25–30° window
Knee tracking is symmetric , with the patella traveling over your second-to-third toe line in frontal view
All three need to be stable before you move on to fore-aft adjustment. Height is the foundation. Build on it before touching anything else.
Fore-Aft Setback Optimization: ±10mm Shifts and Chamois Pad Alignment
Saddle height determines how far your legs travel. Fore-aft position determines where that motion happens — and a 10mm error in either direction creates a very different set of problems.
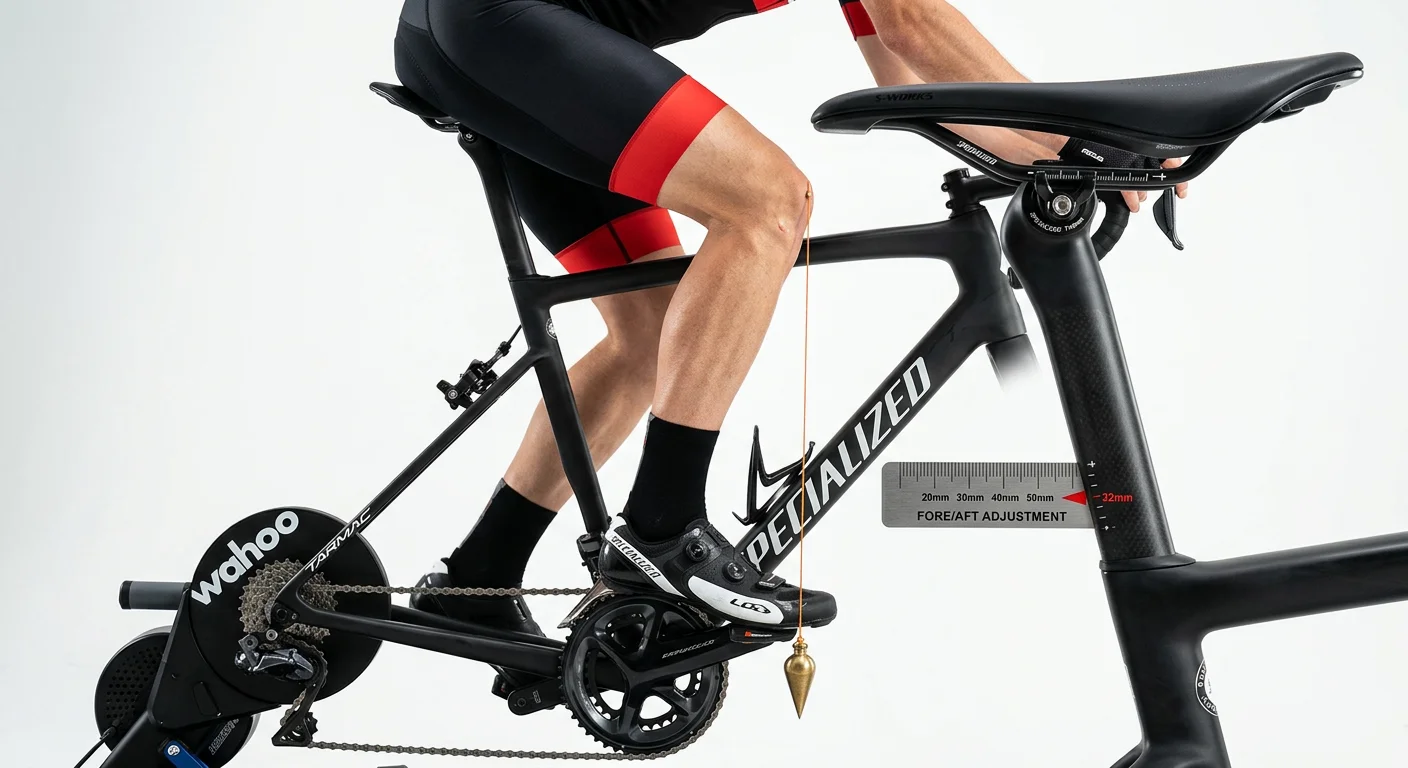
The classic reference point is the knee-over-pedal-spindle (KOPS) check.Advanced ODM cycling bib shorts development projects frequently analyze rider positioning data alongside chamois placement to optimize contact-point ergonomics.: with your crank at the 3 o'clock position, drop a plumb line from the front of your knee. It should pass through the pedal axle center. In practice, fitters treat ±2–5mm from that center as "within range." The exact geometry matters less than what the position does to your balance, muscle recruitment, and — most importantly — where your sit bones land on the chamois.
Read Your Symptoms First
The two error patterns are easy to tell apart once you know what to look for.
Too far forward feels like this: your hands carry noticeable weight. Your pedaling becomes quad-dominant with almost no hamstring engagement through the bottom of the stroke. Hand numbness builds on longer rides. The front of your knee aches because it spends too much time tracking ahead of the pedal spindle. That increases anterior shear forces on every revolution.
Too far rearward feels like the opposite. Your hands feel almost weightless, but high cadence — anything near 100 rpm — quickly becomes labored. Glute and hamstring fatigue builds faster than it should. You may also feel a vague posterior knee discomfort that gets worse on climbs. The cause: your knee stays behind the spindle, overloading the posterior chain.
Neither pattern is subtle. Recognize one of them, and you already know which direction to move.
The Back-to-Front Test Protocol
Don't guess at your optimal setback. Find it step by step.
Slide the saddle all the way to the rear of the rails. Ride at a steady tempo or threshold effort on a trainer for 20 minutes. Note how your hands feel, how the pedal stroke feels at the bottom, and whether 90–100 rpm feels natural or forced.
Move the saddle forward 5mm. Ride another 3–5 minutes at the same effort level. Check three things: hand pressure, pedaling balance (quads vs. hamstrings), and ease of spinning at higher cadence.
Repeat in 5mm increments until you reach the forward limit. You've gone too far when the hands-off balance test fails — swing your arms back while riding at threshold. Tipping forward or arching your back to stay upright means you've crossed the line.
Step back 2–3mm from that forward limit. That's your functional window.
The full exploration range is ±10–15mm around your starting position. That's enough to go from too far rearward to too far forward and pinpoint the optimal zone in between.
The Height–Setback Interaction You Can't Ignore
These two adjustments are directly linked. Moving the saddle 10mm forward is the practical equivalent of lowering it by 3mm relative to the bottom bracket. Move it 10mm rearward, and effective saddle height rises by the same amount.
So: any setback change of 5mm or more requires a saddle height recheck. Skip this step and you'll reintroduce the exact height errors you corrected earlier — overextension creeping back from a rearward move, or excess knee flexion returning from a forward shift.
The rule is simple: adjust setback, then re-verify that your knee angle at BDC falls back in the 25–30° window. Fine-tune height in 1–2mm increments until it does.
Chamois Alignment After a Setback Change
Here's what most riders miss: moving your saddle moves your pelvis over the chamois pad . The pad doesn't follow.
A 5–10mm rearward move shifts your sit bones toward the rear edge of the chamois. On longer rides, the pad starts to "roll" at the back — creating pressure ridges right under your ischial tuberosities.
A 5–10mm forward move shifts your pelvis forward relative to the pad. The rear chamois bulk ends up behind your sit bones instead of under them. The front pad mass can bunch under soft perineal tissue — raising anterior pressure.
After any setback change of 5mm or more, check chamois alignment this way: get into your normal riding posture on a trainer and press along the pad to find the thickest zone . That zone should sit under your sit bones. If the pad's crest has shifted more than 10mm off-center from your ischial contact points, the setback change has thrown off your contact system — and no amount of chamois cream fixes that.
Also check for bunching at the front crease while you're in the drops. Fabric folding there is a clear sign your pelvis has rotated or shifted forward relative to the pad. A small rearward saddle adjustment or a 1° nose-up tilt usually corrects it.
Lock It In
Once you've found your setback, torque matters. Re-torquing is not optional.
Most two-bolt alloy and carbon seatposts specify 4–6 Nm for rail clamp bolts. Carbon rails max out at 5–6 Nm — check both the seatpost and saddle markings before you reach for a wrench. For two-bolt posts, loosen both bolts a couple of turns, adjust fore-aft while holding your tilt angle, then tighten each bolt in turns to reach final torque. Use a torque wrench. An under-torqued clamp bolt lets the saddle creep forward or rearward mid-ride — adding asymmetric pedaling load and uneven chamois wear that looks exactly like a positioning problem you've already fixed.
Mark your final rail position with a fine line before your next ride. That way, you'll know exactly where to return if anything shifts.
Saddle Tilt Angle Fine-Tuning: ±2° Adjustments for Perineal Pressure Relief
Tilt is the most misunderstood part of saddle setup. Height and fore-aft get measured, tested, and adjusted in clear steps. Tilt gets eyeballed — and that lazy approach is why perineal numbness keeps coming back even after everything else is sorted.
The working range is small: −2° to +2° around a true level baseline.A specialized cycling apparel factory may use pressure-mapping technology to validate how small tilt changes affect rider comfort across different saddle categories. Inside that window, one degree of change can move pressure off soft perineal tissue and onto the pubic rami — where your body is built to carry load. Go outside it, and you stop fixing comfort. You start creating new problems.
Establish a True 0° Baseline First
Set your reference point before touching anything. A 1° floor slope will throw off every measurement you take.
Do this in order:
1. Level the bike — place a spirit level between the axles or along a horizontal frame reference
2. Place a rigid, flat object (a book or clipboard works) along the full saddle length
3. Measure with a digital inclinometer or a smartphone angle app on top of that object
4. For curved or wave-profile saddles, measure the central sitting area only — not the nose or tail
That's your neutral. Everything else gets calibrated against it.
Nose Up: Almost Never the Right Answer
An upward-tilted nose pushes pressure straight into the tissue you're trying to protect. For both men and women, even a small nose-up angle loads the perineal soft tissue instead of spreading weight to the sit bone area. Most professional fitters are blunt about this: there are very few situations where nose-up tilt is appropriate — almost none.
Riding with any positive tilt and feeling perineal pressure or numbness? That's your first fix. Drop the nose to 0°. Ride 15 minutes at endurance effort before making any other call.
Nose Down: Helpful Until It Isn't
A 1–2° nose-down tilt is the standard first move for perineal pressure. It shifts load toward the pubic rami and cuts soft tissue compression. For women dealing with lower back discomfort alongside anterior pelvic tilt, that same small nose-down change can reduce lumbar extension and noticeably improve overall comfort.
Past that threshold, the logic flips.
Tilt Angle | What Happens | Correction |
|---|---|---|
+1° to +2° (nose up) | Perineal pressure increases; soft tissue loading | Drop to 0°, then test −1° |
0° (level) | Neutral baseline — start here | Ride test before adjusting |
−1° to −2° (nose down) | Pressure shifts to pubic rami; optimal range for most riders | Fine-tune in 1° steps |
Beyond −2° to −3° | Forward sliding begins; hand and wrist load increases | Return toward level; re-examine height and fore-aft |
Past −2° nose-down, you stop relieving pressure. You start creating it somewhere else. Riders compensate by gripping hard with their quads and dumping weight onto their hands. That looks like a handlebar reach issue — but it's a tilt issue.
The 1° Adjustment Protocol
Make one change at a time. The feedback window is too narrow to know what worked otherwise.
Feeling perineal pressure or numbness at 0°:
- Drop 1° nose down
- Ride 10–20 minutes at steady endurance pace in the hoods
- Track when numbness starts and where pressure builds
- Pressure drops and no sliding? Keep the adjustment
- Sliding or hand overload shows up? Move back 1° toward neutral
Sliding forward or hands carrying too much weight:
- Move 1° back toward level
- Re-test at the same effort level
- Sliding still happening near-level tilt? The root cause isn't tilt — recheck saddle height (too high pushes you forward) and fore-aft position
Tilt Interacts with Everything Else
Most riders skip this step. Every tilt change shifts your position at the bottom bracket, moves your torso angle, and alters hip closure. A 1° nose-down adjustment works a lot like moving the saddle a few millimeters forward — small, but enough to nudge your knee ahead of the pedal spindle.
After any tilt change, check two things:
- Your BDC knee angle still falls in the 25–30° window
- The plumb line from your kneecap still tracks within ±2–5mm of the pedal axle at 3 o'clock
Either has drifted? Make small height or setback corrections in 1–2mm steps before your next ride.
One Practical Limit to Respect
Cranking the seatpost clamp bolt to hit large tilt angles puts concentrated stress on the saddle rails right at the clamp contact point. After repeated adjustments, inspect the rails for flat spots or dents where the clamp grips. Uneven clamping — one side engaging before the other — loads the rails unevenly. That can crack the rails under hard efforts or rough road surfaces.
Your comfort position needs more than ±3° from level? The tilt adjustment has hit its ceiling. The fix is a different seatpost head geometry or a different saddle shape — not more bolt tension.
Bib Short Chamois Geometry vs Saddle Profile Pairing Rules
The chamois pad doesn't fix your saddle. It works with your saddle — or against it.
Most riders miss that difference. The usual approach is to buy a saddle, feel discomfort, then upgrade to a thicker chamois. But thickness isn't the real variable. Geometry match is. A chamois that doesn't fit your saddle's shape and width creates pressure ridges, bridging, and inner-thigh friction. No chamois cream fixes that. Get the pairing right, and even a basic pad does its job well. Get it wrong, and a premium chamois makes things worse.
The rule is simple: choose your saddle first, then pick the chamois that complements it.This pairing-first approach is increasingly adopted by professional cycling gear wholesaler networks when recommending products to retailers and teams. Not the other way around.
Chamois Thickness Is About Discipline and Duration — Not Comfort Level
Before matching pad to saddle shape, get the thickness right for your riding context. More padding isn't always more comfort. At high cadence or in an aggressive position, a thick pad increases inner-thigh friction and "grabs" on every downstroke.
Use this as your reference:
Thickness Band | Best For | Watch Out For |
|---|---|---|
Thin: 3–5 mm | Racing, crits, experienced riders, warm weather | Too thin for 3+ hour endurance rides or rough roads |
Medium: 6–9 mm | Most road and gravel rides, 2–4 hour efforts | The reliable default for mixed-pace riding |
Thick: 10–15 mm | Endurance, touring, building saddle tolerance | Higher density matters more than raw thickness here |
One detail worth knowing: riders over 75 kg or those riding hard carbon saddles on rough roads should focus on high-density foam (70–80+ kg/m³) in the sit-bone zone. Don't chase peak millimeter count. A firm, focused 10 mm pad beats a soft 14 mm pad for managing fatigue over long rides.
Wide, Flat Saddles (155–165 mm): Match the Platform, Don't Bridge It
Wide, flat saddles spread load across a broad surface. The problem they create is bridging — a stiff chamois pad holds its own shape instead of conforming to the saddle's platform. The pad then contacts its own edges only. That creates two pressure lines under your sit bones instead of support spread across the full width.
What to look for in a chamois for wide saddles:
Broad rear section with anatomical contouring — the pad's rear zone should follow the saddle's flatter curve so your sit bones contact the full platform
Progressive multi-density layout — firmer under the sit bones, softer and thinner toward the inner thigh. This allows natural movement without hard edges at the saddle wings
Thickness: 8–11 mm in the sit-bone zone, tapering to ≤6–7 mm toward the inner thigh
Strong lateral taper before mid-thigh — the rear pad width should span your sit-bone measurement plus about 20–30 mm per side, then taper off before the pedal-stroke zone
What to avoid:
Rigid, high-loft "sofa" pads that hold their shape against the saddle surface — these bridge wing to wing and pinch your thighs on every downstroke
Chamois with bulky side wings that extend far down the inner thigh — the saddle already covers that surface area, so extra fabric just adds friction
Narrow, Curved Saddles (135–145 mm): Focused Support, Not Extra Coverage
Narrow saddles support you within the channel. They work through precise sit-bone contact, not broad platform area. Your chamois needs to match that precision. A wide, heavily padded chamois on a narrow saddle puts foam where the saddle curves away. That creates a floating, spongy layer that hides saddle feel and shifts load onto soft tissue.
What to look for for narrow saddles:
Tapered, compact sit-bone zones with high-density foam focused under the ischial tuberosities — no wide wings
Minimal nose bulk , with a relieved or thin center channel that lines up with the saddle's groove or cutout
Thickness: 5–7 mm for race and TT use; up to 8–10 mm for endurance, but the pad must stay narrow and well-tapered at the sides
Here's a quick test: sit in your normal riding position and check what you feel. You should feel direct sit-bone contact through the pad into the saddle. The pad feels uniformly spongy and you can't sense the saddle beneath it? The chamois is too thick for your saddle profile.
For riders in aggressive aero positions, this matters even more. Forward hip rotation shifts your contact point toward the nose. A compact, forward-tuned chamois with lower bulk at the rear and less padding at the perineal area stops the bunching and pressure buildup that standard endurance pads cause in a deep tuck.
Comfort and Gel Saddles: Don't Double-Stack the Softness
Your saddle already has integrated gel inserts or thick comfort foam? A plush chamois won't add comfort — it will hurt your fit.
Here's why: stacking a 10 mm chamois on top of a padded comfort saddle raises your effective contact height by 3–5 mm. That's enough to push your knee angle outside the 25–30° window you set during your bike fit. Plus, thick foam fills in the saddle's built-in pressure-relief channels. Those channels are there for a reason. Filling them in turns deliberate design features into pressure ridges.
For gel and comfort saddles, go slim and firm:
- 5–7 mm , multi-density, with high-density central foam
- The shape should complement the saddle's contours, not fight them
- Keep the channels clear so the saddle's built-in relief geometry can do its job
The Pairing Summary
Saddle Profile | Chamois Shape | Thickness | Key Rule |
|---|---|---|---|
Wide, flat (155–165 mm) | Broad rear, anatomical contour, strong lateral taper | 8–11 mm sit-bone zone | No rigid pads that bridge saddle wings |
Narrow, curved (135–145 mm) | Tapered, compact, minimal nose bulk | 5–7 mm race/TT; 8–10 mm endurance | Feel saddle contact through the pad |
Hard carbon / minimal padding | Same geometry as saddle; density-focused | 8–12 mm , 70–80+ kg/m³ foam | Heavier riders, rough roads — density beats thickness |
Comfort / gel saddle | Slim, firm, shape-complementing | 5–7 mm | Don't stack softness on softness |
One final detail most riders skip: check that the chamois relief channel lines up with your saddle's cutout or groove. Those two features can be offset by as little as 10–15 mm. That's enough for the foam to collapse into the saddle's pressure-relief area and create a ridge right where the saddle was built to provide relief. In riding position, press along the pad from front to back. The channel and the saddle groove should line up. They don't? Sort that out before adjusting anything else.
30-Minute Self-Fit Workflow: Step-by-Step Contact Point Optimization
Every adjustment you've made until now has been preparation. This is where it becomes a system.
The workflow runs in five stages. Each stage builds on the last. Each takes five to six minutes. Work through them in order. Height affects setback. Setback affects tilt. Tilt affects how your chamois sits under your pelvis. Change them out of order and you'll spend the next three rides chasing your own corrections.
Before you start, write down three numbers:
- Your current saddle height (bottom bracket center to saddle top, in millimeters)
- Your current fore-aft position (bottom bracket center to saddle nose, in millimeters)
- Your current tilt angle (from a digital inclinometer placed on the saddle's flat central section)
These are your reversion points. Something gets worse? Return here. No guessing.
Assign your primary symptom a severity score from 0 to 10. You'll rescore it after the validation ride. That number tells you whether the system is working.
Stage 1 — Height (Minutes 0–6)
Put on your riding shoes and clip in. Set the crank to 6 o'clock. Place your heel on the pedal. Your leg should reach full extension with no hip rock. No full extension? You're starting from a broken baseline — fix this first, in 3mm increments , before moving on.
Once the heel check passes, verify your knee angle at bottom dead center. Use a slow-motion video or angle app. Target: 25–30° with your foot in normal pedaling position. Each millimeter of saddle height changes your knee angle by one degree. You're not estimating — you're calculating.
Log the final height to the nearest millimeter. Torque the seatpost clamp: 5–7 Nm for alloy, 4–6 Nm for carbon. Use a torque wrench.
Stage 2 — Fore-Aft Setback (Minutes 6–14)
Level the bike on your trainer. Set the cranks to 3 and 9 o'clock. Drop a plumb line from your tibial tuberosity — the bony bump just below your kneecap — with your foot in normal pedaling position.
The line should intersect the pedal axle. Adjust in 5mm increments. Forward of the axle: move the saddle rearward. Behind the axle: move it forward.
Two things to track as you adjust:
- Hand pressure — forward positions load your hands; rearward positions unload them
- Cadence feel — rearward positions make high cadence (90–100 rpm) feel labored
After any setback change of 5mm or more, re-verify your height measurement. Moving the saddle 10mm forward drops your seat height by 3mm relative to the bottom bracket. That's enough to push your knee angle outside the window you just set.
Once the plumb line checks out, stand up and do six to ten pedal strokes at moderate resistance. Sit back down. The thickest rear zone of your chamois pad should land under your sit bones. Landing on the saddle nose? Move the saddle rearward 3–5mm. Overhanging the rear edge? Move it forward.
Torque the rail clamp bolts: 12–14 Nm for alloy rails, 7–9 Nm for carbon. Tighten in turns, alternating sides.
Stage 3 — Tilt (Minutes 14–20)
Set the saddle to a true 0° using a digital inclinometer on the central flat section. Anything between −0.2° and +0.2° counts as level. That's your neutral reference.
Adjust by symptom, in 1° steps only:
Perineal numbness or forward sliding → tip nose down 1°
Heavy hands, shoulder tension, sliding off the front → move back toward level, or 1° nose-up from current position
Maximum useful nose-down range: −2°. Go past that and you shift load onto your hands. Your quads start compensating — and the result looks just like a handlebar reach problem
After any tilt change, re-measure your height and fore-aft numbers. Both should stay within ±1mm of your logged values. Either one has drifted? Reset to your logged numbers before moving on.
Stage 4 — Chamois Integration (Minutes 20–25)
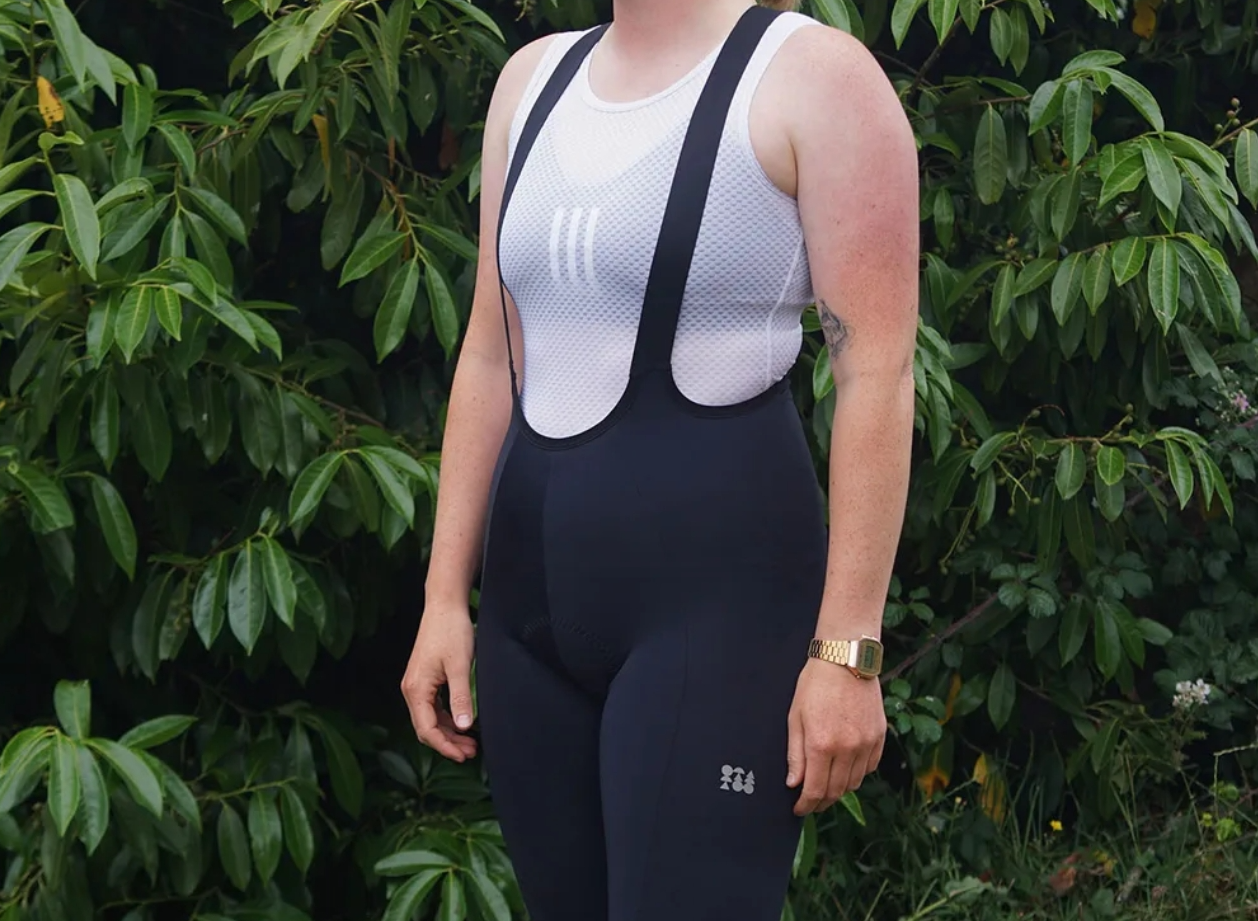
Put on the exact bib shorts you wear on your longest rides. Get into your normal riding posture on the trainer.
Run through this four-point check:
Rear pad coverage — the back edge of the chamois should extend at least 10–15mm behind your sit bone contact point . No sit bone should sit on stitching or a thin edge zone.
Anterior coverage — no gap between the front of the pad and your pubic region once you're fully in your riding posture.
Leg gripper stability — the gripper should lie flat without rolling. It should move less than 10mm per stroke cycle during pedaling. More than that means the bib is too large or cut for a different hip shape.
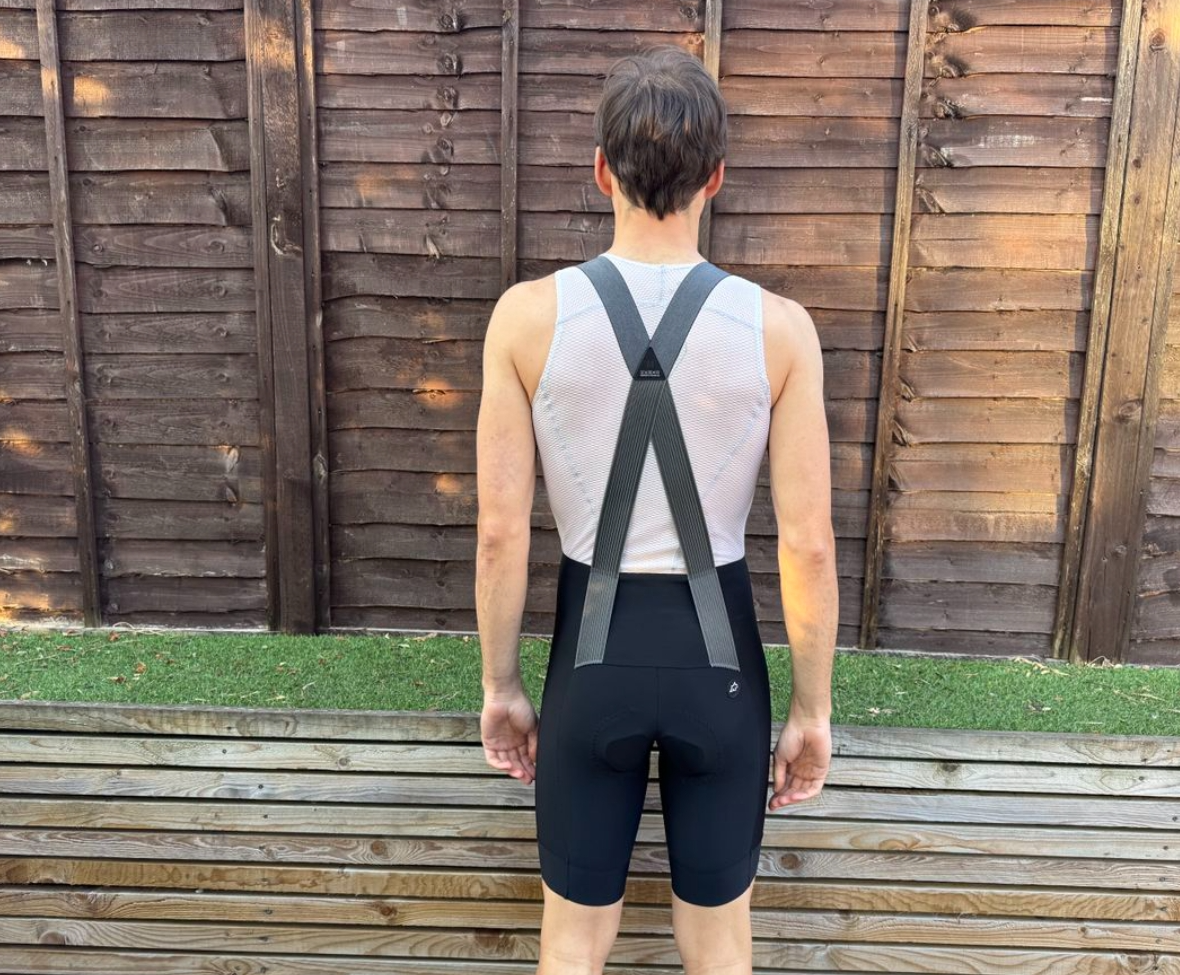
Shoulder strap tension — in riding posture, you should slide two fingers under the strap at your collarbone without much resistance. Straps that pull upward too hard pull the chamois out of alignment with your sit bones on longer rides.
Ride seated for two minutes on the trainer. The pad should stay centered. It migrates? That's a sizing issue — not a chamois quality issue.
Stage 5 — On-Bike Validation (Minutes 25–55)
Ride 20–30 minutes at Zone 2 — 60–70% of FTP, conversational effort. This is the right intensity. Hard enough to show real movement patterns. Easy enough that fatigue doesn't distort your feedback.
Track two things:
- When your primary symptom appears (note the exact minute)
- How severe it is at the end of the ride (rescore it 0–10)
The adjustment rules after your validation ride are simple:
Result | Action |
|---|---|
Symptom score drops ≥3 points | Keep the changes. Ride again tomorrow at the same effort level to confirm. |
Symptom score unchanged or a little better | Change one variable by the minimum increment (3mm for height/setback, 1° for tilt). Retest. |
Symptom score worsens by ≥2 points | Revert the last single adjustment to your logged value. Start from there. |
One rule covers all of it: change only one variable per iteration. Height, setback, or tilt — never two at once. Change two things in the same session and you lose the ability to know what worked. That clarity is the whole point of the system.
The position is set once you can ride more than two hours at endurance pace with your primary symptom at 2/10 or below , and no new contact-point issues at the hands or feet. That's your benchmark. Everything before that is iteration.
Conclusion
Most riders spend years blaming the wrong thing. They buy a new saddle when the real issue is chamois alignment. They upgrade their bib shorts when a 3mm fore-aft shift would have solved everything.
Here's the uncomfortable truth: saddle position and bib short fit aren't two separate problems. They're one system. Adjust one without the other, and you're always one variable short of a real fix.
You now have a diagnostic framework — not just a checklist.For brands evaluating product upgrades, solving fit and pressure issues through better design often creates more value than competing solely on cycling apparel wholesale price. Trace perineal numbness back to a specific tilt angle. Match chamois geometry to your saddle profile before you spend a dollar. Run a 30-minute self-fit session and feel the difference on your very next ride.
Start with your dominant symptom. Work the matrix. Make one adjustment at a time.
Comfort isn't a product you buy — it's a calibration you earn. And now you know how to dial it in.