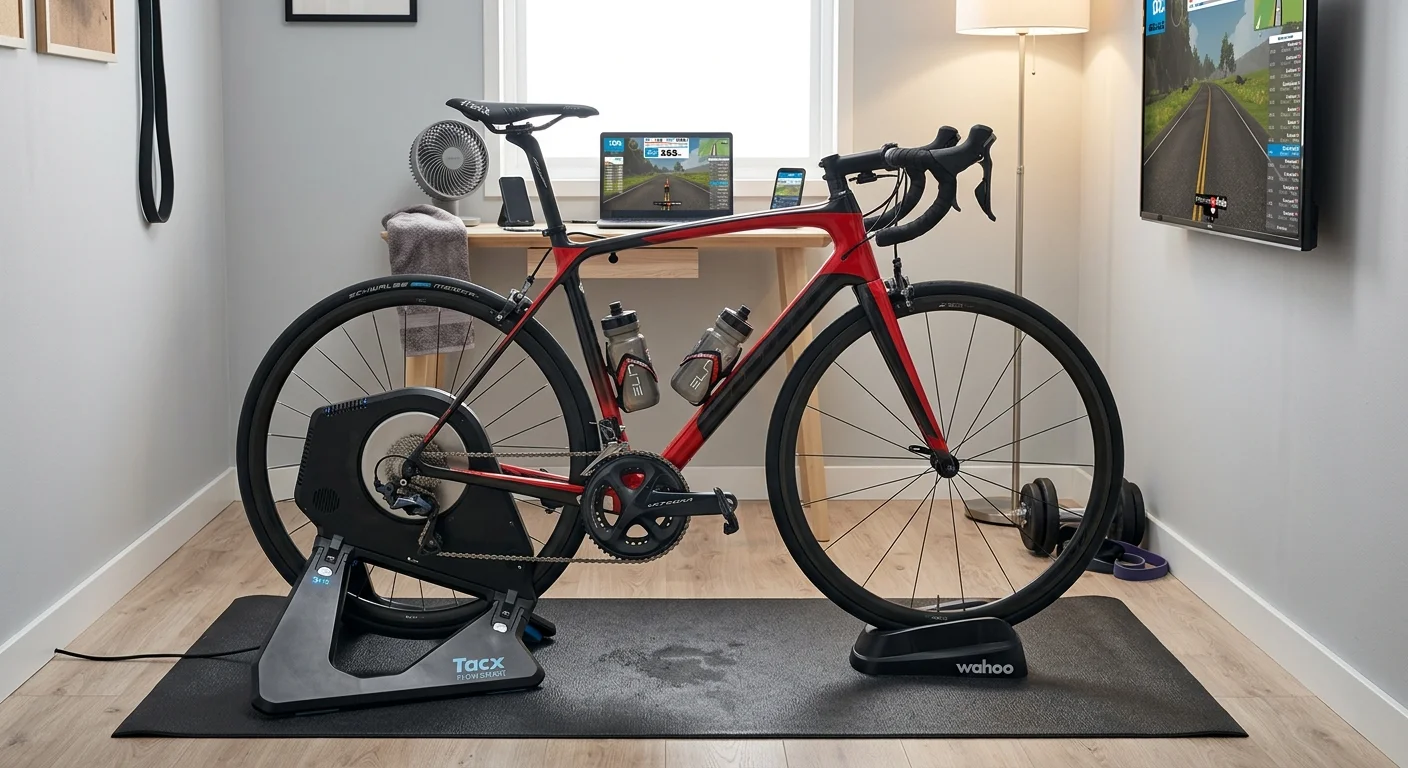
You pulled the trigger on a smart trainer. The KICKR is humming, Zwift is loaded — and then reality hits. Sweat is pooling under your bottom bracket. Your garage feels like a sauna at 85°F. Your ANT+ signal keeps dropping mid-interval like a bad phone call.
The trainer was just the start.Riders building a custom indoor cycling setup quickly discover that accessories often have a bigger impact on comfort and consistency than the trainer itself.
The difference between a miserable pain cave and one you look forward to every morning? It's the accessories. The unglamorous, unsexy gear nobody talks about — until they've ruined a hardwood floor or bonked through a century ride because they were too overheated to think straight.
This guide breaks it all down with a priority-ranked, budget-tiered list of the best indoor cycling accessories for Zwift and home training. So you spend smart and upgrade in the right order.
Smart Trainer Mat & Floor Protection System
Hardwood floors and smart trainers don't mix well. The floor always loses.
Salt from sweat doesn't just stain. It seeps into wood grain. It corrodes trainer feet and attacks frame bolts and headset bearings. This happens over months of regular riding. A mat isn't a luxury. Many cycling equipment supplier recommendations place floor protection among the first upgrades because it protects both the bike and the training environment long term.It's basic protection you can't skip.
What to look for:
Material matters more than brand. Closed-cell PVC or dense rubber blocks moisture. Open-cell foam soaks it up instead. Yoga mats (3–5 mm soft foam) crush flat under trainer feet and kill almost no vibration. Skip them.
Thickness sweet spot: 6–10 mm. Dense enough to absorb low-frequency rumble on concrete or hardwood. Go thicker than 12 mm in low-density foam and your sprints start feeling like a waterbed. Not what you want.
Size: go longer than you think. Minimum 180–200 cm covers the front wheel block and rear trainer. Width around 85–100 cm handles pedal sway during hard out-of-saddle efforts.
The three real options:
Option | Price | Best For |
|---|---|---|
10 mm commercial PVC/rubber roll (cut to 2m × 1m) | ~$25–30 | Maximum protection per dollar; concrete basements, hardwood |
Tacx / Elite folding mat (~180 × 90 cm, EVA/PVC) | ~$45–65 | Small rooms; folds away flat and stores easy |
Wahoo KICKR Floormat (91 × 198 cm, 6 mm PVC) | ~$70–80 | Apartment setups; anti-slip, noise-insulating, photo-ready |
The pro move: After every VO2 session, wipe the mat with a damp cloth before the salt dries and hardens. Takes 30 seconds. This protects your floor finish and keeps trainer feet free from slow corrosion damage over time.
Avoid this: The "gym tile" interlocking foam squares look useful on paper. In practice, the seams collect salt and moisture. Individual tiles also shift under hard sprints. One solid, continuous mat beats them every time.
This is Layer 1 priority — buy it before anything else on this list.
Indoor Cycling Apparel: What You Wear Actually Matters
Most riders obsess over watts and cadence, then ignore what they're sitting in for two hours. That's a mistake.
The chamois between you and your saddle during a long Zwift endurance block isn't a small detail. It's the difference between finishing the ride and bailing at 90 minutes with saddle sores.
What makes a bib work indoors:
Multi-density chamois construction — a high-density core (120–200 kg/m³) sits under your sit bones, with softer transition zones (60–90 kg/m³) moving outward. Flat-density pads feel fine on a 45-minute outdoor spin. Go stationary for 90 minutes and they turn brutal fast.
No central vertical seam through the saddle contact zone. This is non-negotiable. Outdoors, you shift position often. Indoors, you don't. Seam pressure builds hard without that movement.
Antimicrobial, perforated foam. Indoor sessions produce far more sweat than outdoor rides at the same effort. Moisture-trapping pads breed bacteria fast. Perforated foam lets heat and sweat escape.
50–80% nylon / 20–30% elastane fabric blends give you the stretch and shape recovery you need. They hold up after repeated washes without sagging.
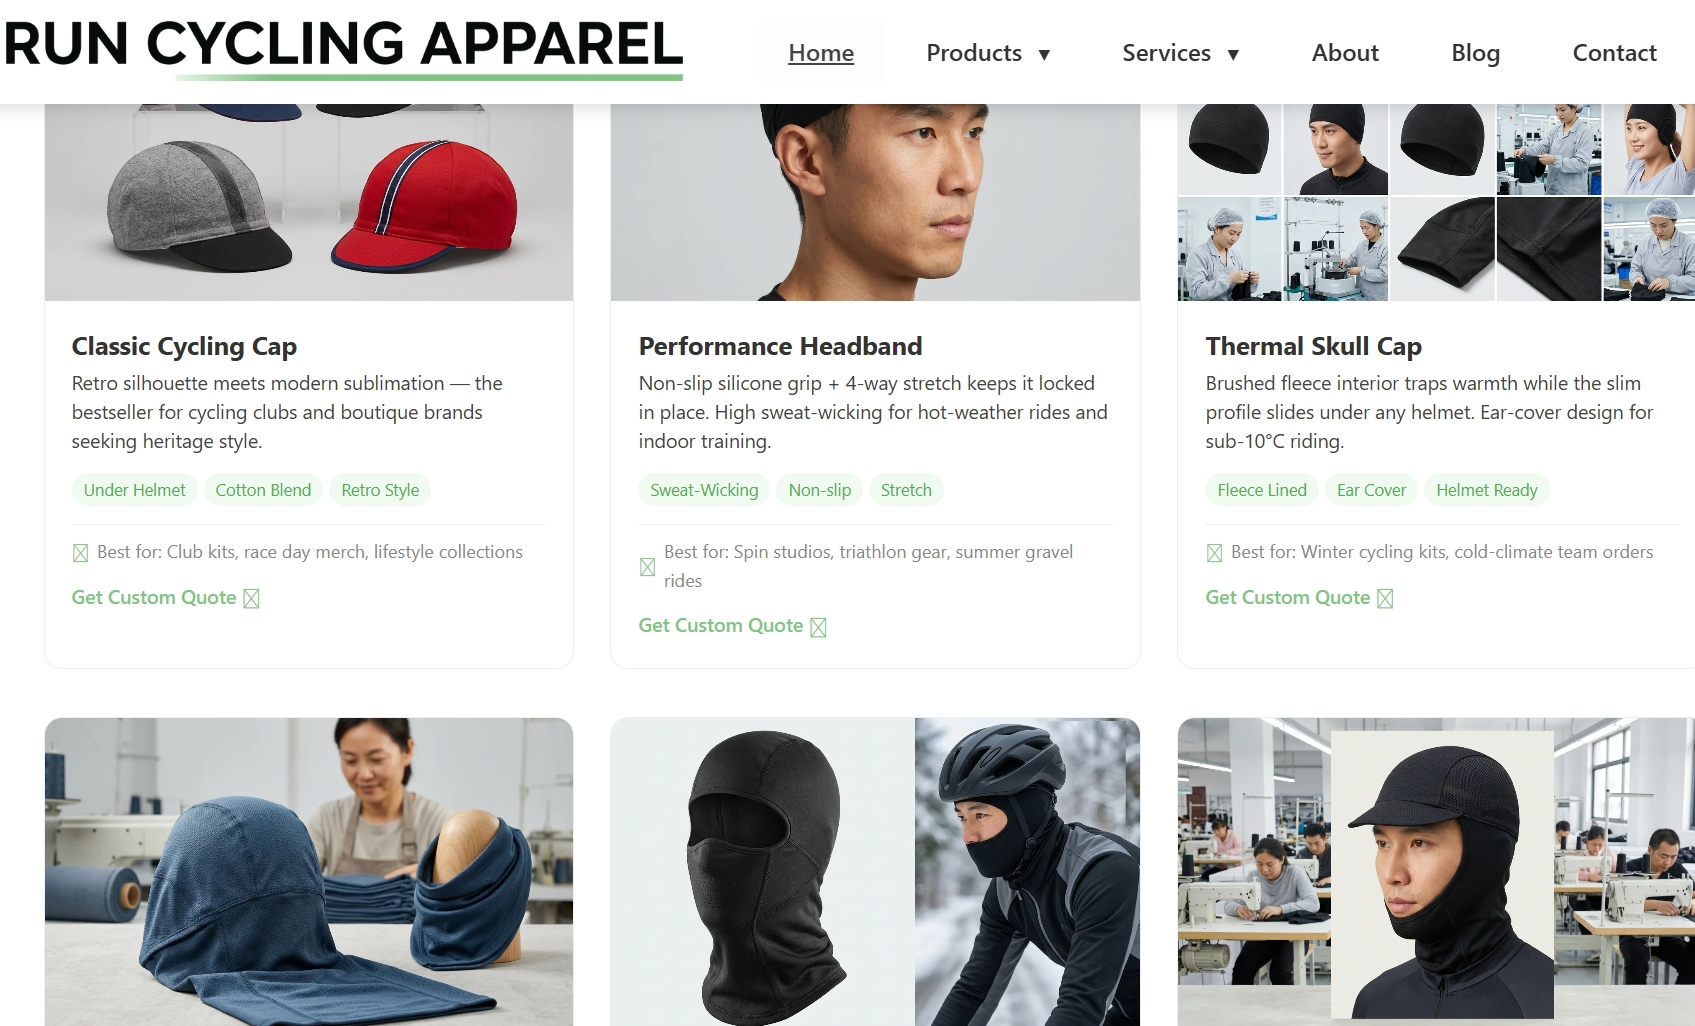
For teams, clubs, or Zwift racing groups needing custom cycling kits, Runcyclingapparel.com is an OEM/ODM manufacturer with 30+ years of production experience. MOQ starts at 50 pieces. Cycling apparel wholesale pricing runs $45–$65 per unit. Production lead time is 20–30 days. DDP/DDU shipping covers 40+ countries — practical for distributed Zwift teams spread across multiple regions.
Practical note: Compare bibs by chamois density specs — not brand logos. A well-built $60 bib with proper multi-density padding outperforms a $120 jersey-brand bib built to look good in photos.
Indoor Cycling Fan for Sweat & Core Cooling
Here's a number that changes how you think about fans: 7 bpm.A leading indoor cycling accessory wholesaler will often rank high-velocity fans above entertainment upgrades because cooling directly affects training output.
That's the average heart rate penalty at the same power output — no fan, no cooling. A controlled test at ~339W showed riders with a strong fan averaging 144 bpm and 36.0°C core temp. No fan? 151 bpm and 36.9°C. That's before cardiac drift adds more damage across a 60-minute sweet-spot block. At race intensity, the researcher's conclusion was blunt: you'd have to slow down. You can't hold the same output without cooling.
A fan isn't comfort. It's a performance variable .
The Three Fan Types — A Straight Ranking
Option 1: Industrial / Blower Fan (~$70–90)
An 18" drum or job-site blower fan moves 3,000–4,500+ CFM at max speed. Three-speed switch. No smart setup needed. TrainerRoad names high-velocity blower fans as the top solution for indoor cooling — and the reason is simple. You get maximum airflow per dollar. No Bluetooth issues. Works with every Zwift setup from Apple TV to PC. No pairing screens to deal with.
Best pick for brutal airflow without smart integration.
Option 2: Smart Cycling Fan — Wahoo KICKR HEADWIND (~$250)
The HEADWIND connects via Bluetooth or ANT+ to your heart rate monitor, speed sensor, or power meter — the same sensors already feeding Zwift. HR climbs on a virtual Alpe du Zwift ascent. Fan speed rises with it. Four manual speed settings sit on the unit itself. Airflow reaches 30+ mph in a tight, torso-focused beam.
It doesn't sync to Zwift's game engine, but it reads the same sensor data in real time. The real-world result is the same: effort goes up, airflow goes up.
Works with PC, Mac, Apple TV, iOS, and Android — as long as your sensors broadcast over BT or ANT+.
Option 3: Desk / Box Fan (~$30–50)
Moves 200–600 CFM . Quiet. Fine for a living room. Not enough power on its own for anything above Zone 2 in a warm space. Use one as a face fan while a stronger unit handles torso cooling. Don't make it your main setup.
Placement: Where You Point It Matters More Than Most Riders Think
Aim at your chest and torso , not just your face. Your core temp drops faster with airflow over large skin surface areas.
Best distance: 60–90 cm from the rider. Close enough for strong convective cooling. Far enough to keep the noise tolerable.
Two focused fans beat one big fan every time. A front fan pulls heat from your chest. A rear or side fan aimed at your lower back and hips clears the humid air that builds there. Cross-flow breaks the moisture layer on your skin — that's what drives evaporative cooling.
Don't aim a powerful fan straight at your screen or head unit. Tilt it slightly down toward your torso. Blown sweat won't reach your electronics that way.
Budget-Tiered Fan Setups
Budget | Setup | Notes |
|---|---|---|
~$150 | 1× 18" industrial drum fan (3,000+ CFM) at 60–90 cm | Big step up from any box fan; cover floor with a towel and mat |
~$200 | 2× manual floor/blower fans (≥3,000 CFM each) | One front (chest), one rear/side (hips/back); matches TrainerRoad's dual-fan setup |
~$500 | 1× HEADWIND + 1× industrial blower | Auto-ramp for head/torso; steady high CFM on legs and hips |
$1,000+ | 2× smart fans + high-CFM industrial backup + dehumidifier | For hot garages or high-wattage riders; dehumidifier boosts evaporation at the source |
Worth knowing: Sweat still pooling on your floor with a fan running? The issue might not be airflow volume — it might be humidity . A dehumidifier or an open window cuts ambient moisture. Sweat evaporates from your skin before it drips. Fans and ventilation work as a team, not on their own.
Heavy sweaters in warm garages run two or three fans . That's not overkill. That's how you finish a 90-minute threshold session without your power dropping off in the final 20 minutes.
ANT+ Dongle & Zwift Compatible Devices Stability Kit
Signal dropouts don't warn you. They just kill your power reading at 400 watts, freeze your cadence mid-sprint, and leave you staring at a spinning wheel while your Zwift race group disappears up the road.
For Windows and Mac users, this is almost always a placement problem — not a hardware problem.
The fix costs $20–30 and takes ten minutes.
Why Placement Beats Everything Else
ANT+ runs on 2.4 GHz — the same crowded band as your Wi-Fi router, Bluetooth headphones, and every other wireless device in the room. Plug your dongle into a rear motherboard USB port and it's fighting through metal chassis, desk cables, and wall interference before it reaches your trainer. Zwift forums are full of "all devices lost" reports from riders using exactly this setup.
The fix is straightforward. A shielded USB 2.0 extension cable (2–3 m) moves the stick off your desk and onto the floor — right under your bottom bracket or near the rear axle. Get the dongle within 50 cm of your sensors with a clear line-of-sight. That single change cuts out most dropouts. Riders using this setup see zero signal loss across 60–120 minute Zwift sessions , even in dense apartment Wi-Fi environments.
One more detail: plug into a USB 2.0 port, not USB 3.0 . USB 3.0 generates its own 2.4 GHz interference. ANT+ is low bandwidth — it doesn't need the extra speed. It needs a quiet radio environment.
Which Stick to Buy
Device | Price | Best For |
|---|---|---|
Wahoo USB ANT+ Dongle + extension | ~$30 | KICKR/SNAP users; plug-and-play with Wahoo ecosystem |
Garmin ANT+ USB Stick | ~$15–20 | Multi-sensor setups; well-supported by drivers on Windows 11 |
Rotor Universal ANT+ USB Stick | ~$20 | Cross-platform: Windows, Mac, and Android OTG |
Anself ANT+ Dongle | ~$15 | Budget pick; Zwift community calls it "one of the most stable devices out there" |
Unbranded BT 5.0 USB dongle | ~$8–12 | Good for 1–2 BLE sensors in low-interference rooms only; unreliable with 3+ sensors running at once |
Skip the cheap combo sticks. Generic multi-protocol dongles use low-quality radios that create more RF noise than they fix. Spend the extra $5 for a certified stick.
Platform Compatibility: What Works Where
Windows PC/Mac: ANT+ dongle is the gold standard. You can run 2–4 sensors at once — trainer power, cadence, HR strap — without touching your Bluetooth stack. On Windows 11, install drivers through Windows Update → Optional Updates , or grab them from the downloaded zip and install by hand. Your dongle shows up as Dynastream Innovations in Device Manager. Mac Intel and Apple Silicon users will find most certified sticks are plug-and-play.
Apple TV: No USB port, no ANT+ support. ATV runs Bluetooth only and caps the number of sensors it can handle at once. The practical fix is environmental — move your Wi-Fi router to 5 GHz or switch to wired Ethernet. That clears the 2.4 GHz band and tightens up BLE stability without any dongle changes needed.
Budget Allocation
This is one of the highest-impact, lowest-cost upgrades on this list.
Under $300 setup: Spend $20–25 on one certified stick plus a 2–3 m USB 2.0 extension. Done. Nothing else in this tier gives you more stability per dollar.
$300–500 setup: Add a basic powered USB 2.0 hub close to the bike. It keeps cable management clean and puts sensors within 1 m of the receiver.
$500+ pain cave: Run wired Ethernet through an active USB-C dock near the trainer. Mount the ANT+ stick in that same hub. RF and networking both sort themselves out next to the bike. Total spend: $40–70 as a fraction of the full setup.
Avoid this: Don't unplug and re-plug the dongle between rides. Once the driver is installed and pairing is done, leave it alone. Zwift needs a full restart to find ANT+ devices again after a mid-session disconnect — and that's the last thing you want five minutes before a race start.
Zwift Heart Rate Monitor & Cadence Sensor Bundle
Your power number tells you what you're doing. Your heart rate tells you what it's costing you.
Without a chest strap, Zwift's HR-based workout structure has nothing to anchor to. You're flying blind through FTP blocks and VO2 intervals. No fatigue feedback. No training load data worth reviewing. This is a $50–$90 problem with a straightforward fix.
The priority order is simple: Heart rate strap first. Cadence sensor second. Zwift runs fine without cadence data. It doesn't run well without a usable HR source.
Chest Strap vs. Optical Armband
Model | Protocol | Accuracy | Price | Best For |
|---|---|---|---|---|
Polar H10 | Bluetooth + ANT+ | ECG-grade | ~$85 | Structured workouts, FTP progressions |
Wahoo TICKR | Bluetooth + ANT+ | Very good | ~$90 | Clean Zwift + head unit pairing |
Optical armband | Varies | Weaker in sprints | ~$100 | Comfort-first; Zone 2 steady rides |
The optical armband is the comfort choice — but it carries a real tradeoff. Expect 1.5–2 second HR lag during hard efforts. In a Zwift race or a short VO2 microburst, that lag matters. A chest strap reads the electrical signal from the source. An armband pulls data from blood flow through moving skin. For sprint-heavy sessions, the chest strap wins every time.
Dual ANT+/Bluetooth is non-negotiable. You want one strap that pairs to Zwift and logs at the same time to your Garmin Edge or Wahoo ELEMNT. That's the real-world reason dual-protocol matters — not a spec-sheet detail.
Cadence Sensor: One Detail That's Easy to Miss
Mount it on the left crank arm . That's the Zwift-compatible placement. Not the shoe. Not the handlebar. The left crank.
Cadence data earns its place during sweet-spot and threshold blocks. Holding a set RPM target keeps your legs fresher across long sessions. It won't replace a power meter — cadence is cadence, not watts. But it does sharpen the pedaling data you bring into post-ride analysis. That's a real gain over time.
Quick Setup Tips
Pre-wet the electrode pads before clipping the strap on. Dry electrodes take longer to lock signal, particularly at the start of a ride before sweat builds.
Swap the CR2032 battery once a year. Most mid-ride dropouts trace back to a dead battery — not pairing issues.
In Zwift, pairing is: log in → Search under Heart Rate → select your monitor → confirm. Takes under a minute.
The Bundle to Buy
Best overall: Polar H10 + left-crank cadence sensor (~$110–$130 total)
Simpler setup: Wahoo TICKR + cadence sensor (~$110–$120 total)
Either works. Just make sure both pieces broadcast dual ANT+/Bluetooth. Do that, and you're covered across every platform in your pain cave.
Rocker Plate for Indoor Trainer & Dynamic Comfort Base
Three hours into a Zwift endurance block, something starts to break down — and it's not your legs. It's the dead-still rigidity of a trainer that never moves while your body quietly gives up on you.
A rocker plate fixes that. It makes your trainer platform move with you. It's a passive deck that sits under your bike and trainer. It allows side-to-side tilt — and sometimes fore-and-aft movement too. The bike sways beneath you the way it does outdoors. No electronics. No pairing screens. Just physics doing what your body expects.
Why it matters past the 90-minute mark: On a fixed trainer, every pedal stroke drives force straight into your sit bones with zero relief. A rocker plate adds constant small movements through the pelvis. These shifts are subtle enough that you won't notice them in the moment. But they're real enough to cut saddle numbness and lower-back compression by a clear margin. Riders who've made the switch keep saying the same thing: sessions that used to stop at 90 minutes from discomfort now stretch to two-plus hours without the same breakdown.
Three Ways to Get Rolling Motion (And What Each Costs)
Type | Motion | Lateral Range | Price |
|---|---|---|---|
Integrated pivot trainer (e.g., Kinetic Rock and Roll) | Dual elastomer pivot built into trainer | ~1–2" per side | $250–$400 |
Full-motion rocker plate (Saris, Omnirocker Turbo V2) | Linear bearings + inflatable bladders; lateral + fore-aft | 5–7° tilt each side, 2–3" fore-aft | $350–$600 |
DIY plywood + tennis ball build | Hinged deck + compressible foam or tennis-ball supports | 0.5–1" effective arc | $50–$100 in materials |
The Omnirocker Turbo V2 measures 154 cm long and fits all major direct-drive trainers — KICKR, Tacx Neo, Zwift Hub, Elite Direto. The DIY version gets you a very similar ride feel at a fraction of the cost. Most builds use 18 mm plywood cut to ~150 × 70 cm, ball-bearing door hinges along the center axis, and four to eight tennis balls under the outer edges.
Three balls per side: firmer platform, less sway
Two balls per side: more active tilt and movement
Total material cost: $50–$100 and a weekend afternoon.
Zwift Compatibility: Pure Mechanics, Zero Setup
No configuration needed. Rocker plates don't pair with Zwift, TrainerRoad, or any other app. They're mechanical platforms that sit under whatever trainer you're already using. What they do change is how Zwift's simulated gradients feel in your body.
On a climb like Alpe du Zwift, you can rock the bike through each pitch the way you would on real roads. Seated power spreads more evenly across both legs. Standing efforts stop feeling like you're fighting the bike just to shift weight.
Before mounting, check two things:
Your rear axle standard — most modern direct-drive trainers use 12×142 or 12×148 Boost. Make sure your endcaps match before bolting to the plate.
Whether your chosen plate comes pre-drilled for your specific trainer footprint.
Premium plates handle the drilling for you. DIY plates need measuring on your end.
Setup and Tuning: One Mistake to Avoid
The most common rocker plate error is running it too tight. An over-stiffened platform makes your body and bike lean as one solid unit. You end up tilted, not swaying. That defeats the whole point.
The right feel: the bike leans one way while your torso stays centered over the pedals. Both move together? Loosen the tension.
Give it 5–10 sessions before judging anything. Riders coming off rigid trainers need time to rebuild the balance and movement habits that years of fixed training have dulled. The adjustment takes a little time. The payoff on the other side is worth it.
When to Buy One (Priority Tier)
Skip this at the $200 starter level . That budget gets you bigger returns through fans, mats, and an HRM first.
At the $200–$350 dedicated budget — with 4+ hours per week indoors already locked in — a rocker plate becomes the most valuable comfort-per-dollar upgrade left on your list.
At $500+ , go full-motion with lateral and fore-and-aft combined. That's the right call if you race on Zwift or put in two to three long sessions every week.
Bike Trainer Desk & Indoor Cycling Phone Mount
Reaching for your phone mid-interval is how you lose a race. You unclip one hand. Your balance shifts. The bike rocks — and whatever you were trying to do on Zwift Companion just cost you 15 watts and your dignity.
A trainer desk and a bar-mounted phone holder solve this together. They're Layer 2 infrastructure: not glamorous, not the thing you brag about. But they're the difference between a pain cave that runs like a workspace and one that feels like a pile of gear you're constantly fighting against.
The desk does four things that matter:
- Holds your laptop or iPad at eye level so your neck stays neutral
- Keeps nutrition and remotes within reach without dismounting
- Routes cables behind the trainer and out of your rear wheel's path
- Stays put when you sprint and pull on the bars
The phone mount does one thing. It puts Zwift Companion — or your Apple TV remote — at your thumb, right on the bars. Your main display keeps running on the TV across the room.
Desk Options by Budget
Option | Price | Best For |
|---|---|---|
Generic rolling laptop cart | $40–$90 | Budget setups; basic height adjustment, no sweat protection |
KOM Cycling Trainer Desk | $59–$100 | Best value cycling-specific design; 3-tiered device slots, 2 bottle holders, anti-slip surface, 34–50 in height range |
Wahoo KICKR Desk | ~$250 | Premium build; sweat-resistant laminate, rolling casters, 28–48 in push-button height, cable pass-throughs |
Saris TD1 | ~$280 | Top tier; integrated USB + AC charging ports, built-in cable channels, textured non-slip top |
The KOM desk is the sweet spot for most Zwift riders. At $59–$100, you get bottle cutouts and a 24-inch-wide surface with device slots for phone, tablet, and laptop at the same time. Proper cable routing is built in too. A $60 IKEA side table doesn't give you any of that. The 24-inch width matters for a specific reason: go narrower and your elbows clip the edge during hard sprints.
The Wahoo KICKR Desk and Saris TD1 are worth the extra cost for a permanent pain cave setup. The Saris adds integrated USB and AC outlets. One cable runs to the desk, and everything else charges from there. Clean, functional, and worth the extra $30 over Wahoo's version if you're always battling a tangle of chargers.
Avoid high-gloss desktop surfaces. They bounce overhead lighting glare straight into your eyes and get slippery under sweat. Textured or matte finishes grip your devices and bottles in place once the bike starts rocking.
Phone Mount: Keep Companion at Your Thumb
A full desk isn't always necessary. Your main Zwift screen is a wall-mounted TV? A $15–$30 bar mount handles everything else.
The Cycplus Z7 ($20–$30) uses an aluminum alloy clamp. It fits phones and tablets from 4.7 to 12.9 inches — that covers iPad Pro and every phone you're going to run. Mount it center, above the stem. Not on the outer bars, where it gets in the way of your sprint grip. Not off to one side, where you'd have to reach across your body mid-effort.
For Apple TV users: the bar mount is where your remote lives. A recessed tray on the desk works too. Either way, the goal is the same — keep it easy to grab without fumbling.
The Setup That Works
Main display: TV or monitor up front. Laptop or iPad sits on the trainer desk as a secondary Zwift screen or media surface. Phone on the bars runs Zwift Companion. Route cables through the desk's rear channels so they drop behind the trainer — not draped over your cassette.
Budget summary:
- $40–$90: Universal rolling cart + $15–$20 bar phone mount. Gets the job done. Not optimized.
- $100–$150: KOM Cycling desk + Cycplus Z7. Cycling-specific layout, proper bottle slots, controls at your thumb.
- $250–$300+: Wahoo KICKR Desk or Saris TD1 + quality aluminum phone mount. Built for permanent setups. Fits right into a full pain cave build.
This is an easy category to over-spend or under-buy. The KOM desk at $100 covers what most riders need. Put the Wahoo/Saris money toward your fan or rocker plate instead.
Trainer Tire vs Regular Tire with Front Wheel Riser Block
Your expensive road tire is dying every time you clip into a wheel-on trainer. It happens slowly, but it's real.
The roller has no side-to-side movement. It grinds against the same centerline contact point, session after session. Regular tires develop a flat spot. They shed black rubber dust across your mat. One winter of heavy indoor use can kill a tire that should've lasted two seasons outdoors.
A trainer-specific tire costs around $30 and fixes all of that. The rubber compound is harder — built for stationary roller contact. You get less noise, less vibration, and a lifespan of 3–5 years under regular indoor use. TrainerRoad riders say they last "forever" compared to road tires. Garmin also points out that the harder compound improves data accuracy on wheel-on trainers. That matters if you rely on speed-based power estimation.
Pair the trainer tire with a front wheel riser block . Without one, your rear axle drops into the trainer dropout and pulls your front end lower than normal. Your saddle reach changes. Your weight shifts forward. Your hands take extra pressure. A riser block — KOM Cycling's model fits 700×23c up to 29.3-inch wheels — corrects the angle and restores the position you set up for outdoor riding.
This combination runs under $60 total. For wheel-on trainer users, it's one of the highest-value, lowest-effort upgrades on this entire list.
Noise Isolation & Apartment-Friendly Vibration Dampening
Your neighbors can hear your trainer. Not the flywheel whirr — the low rumble traveling through your floor joists into their ceiling at 2 a.m.
That's the tricky part of indoor trainer noise. The sound in your own room might seem fine. Direct-drive and wheel-on trainers push out low-frequency vibration in the 20–120 Hz range . That vibration locks into your building's structure and radiates up through shared floors as impact noise. Your room sounds quiet. The apartment below you does not.
The fix is mechanical decoupling — not soundproofing foam. And it costs under $150. No walls touched.
The Two-Layer Isolation Stack
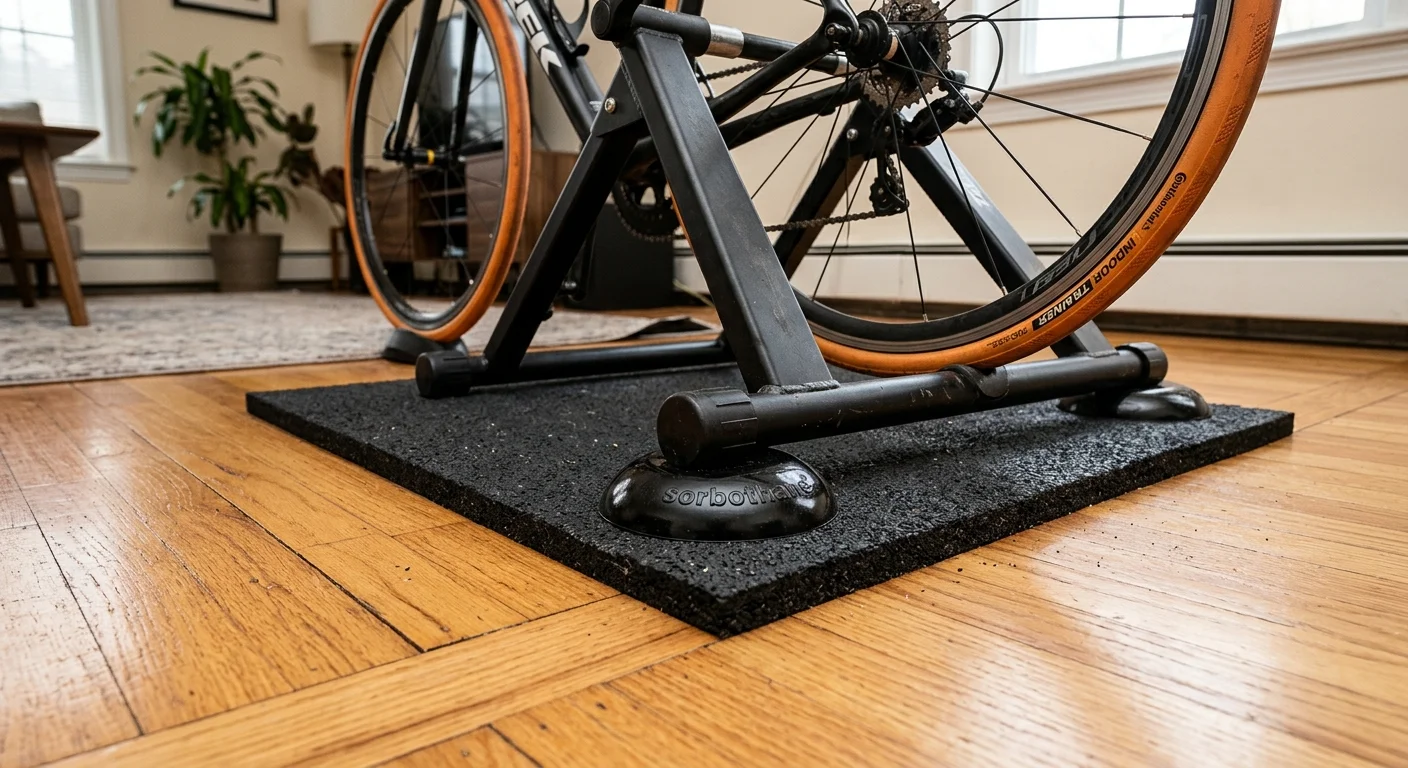
Layer 1: Sorbothane hemispheres (~$30–$40 for 8 pieces)
Sorbothane is a viscoelastic polyurethane. It converts vibration into heat rather than bouncing it back. Standard rubber pads throw energy forward. Sorbothane soaks it up.
Place 4–6 hemispheres under your trainer's contact points. A direct-drive trainer plus bike runs 70–100 lbs total. That weight puts the pads in their optimal 10–20% compression window . Push past that and the pads go flat — isolation drops hard. More pads at the right compression beats fewer pads crushed flat every time.
Don't scatter them across the whole mat. Keep them at contact points under the trainer legs. A soft layer running under the full setup causes wobble during hard sprints.
Layer 2: 12 mm dense rubber mat (~$50–$80)
The Sorbothane handles vibration at contact points. The rubber mat adds mass loading — around 10–15 kg across a full trainer footprint. That extra mass pulls the system's resonant frequency down and blocks what still gets through to the floor.
Thickness matters here. Ten to twelve millimeters of solid vulcanized rubber (density ~1,000–1,200 kg/m³) blocks mid-frequency impact transmission. Go thinner and you're protecting the floor from scratches — not from sound.
Run one continuous mat under the trainer and front wheel block. Don't stagger interlocking tiles under individual legs. Pressure ridges build at the seams and create their own noise.
What Acoustic Foam Does (And Doesn't Do)
Foam panels on walls cut airborne echo and room reverb — NRC ratings around 0.4–0.8 at mid and high frequencies. That's useful for voice chat on Zwift group rides. Cleaner room acoustics improve speech clarity in the 1–4 kHz range where consonant sounds live.
What foam does not do: stop vibration moving through your floor. Zero. It's the wrong tool for structure-borne noise. Sort your mechanical isolation first. Then add a few panels near first reflection points if voice clarity matters to you.
Budget Breakdown
Setup | Isolation Stack | Total |
|---|---|---|
$200 starter | Basic trainer mat only; add 4 Sorbothane pads if neighbor sensitivity is high | $30–$70 |
$500 apartment build | Sorbothane set + 12 mm rubber mat + optional foam panel near mic | $80–$120 |
$1,000 pain cave | Full two-stage stack + strategic wall absorption at reflection points | $120–$150 |
All of it works for renters. No screws, no adhesives, no permanent changes. Interlocking tiles, loose mats, freestanding panels — pack it all out the day you move.
One more thing: On a wheel-on trainer, a dedicated trainer tire cuts roller contact noise by an estimated 50–60% compared to a standard road tire. Mechanical isolation and noise-source reduction work together. Handle both and your 6 a.m. sessions stop being a problem for whoever lives below you.
Conclusion
Your pain cave doesn't have to be a punishment chamber.
After testing every accessory on this list — yes, the sweating was real — the pattern is clear: start with protection, then comfort, then immersion . A trainer mat and a serious fan aren't glamorous purchases. But they keep your carbon frame alive another season. They also stop your FTP sessions from turning into heat-management disasters.
The best indoor cycling accessories for Zwift and home training aren't the ones with the highest price tags. In fact, many products coming from the same cycling accessory factory can deliver similar performance when buyers focus on function rather than marketing claims.They're the ones that remove friction between you and the next workout. A setup that stops fighting you means you stop finding excuses. That's the whole point.
Pick your budget tier. Grab the essentials first. Resist the urge to optimize everything at once. Build the foundation. Ride it hard. Then add the rocker plate.
One more thing: the riders who stay consistent through winter aren't the ones with the fanciest gear. They're the ones who made their space comfortable enough to show up — day after day, no matter the weather outside.